
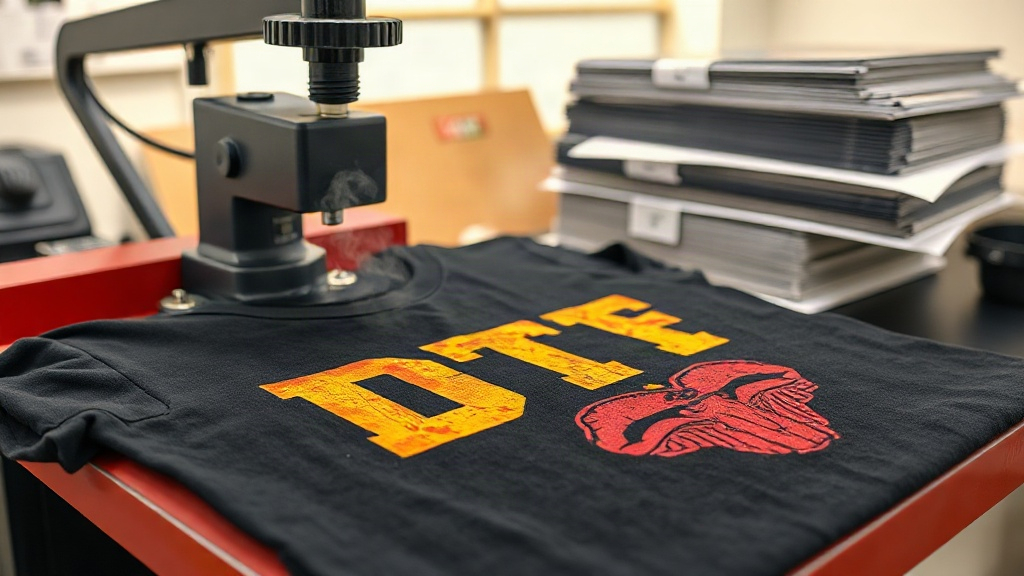
When you want custom t-shirts that pop with color and stand up to repeated wear, DTF transfers have become a go-to solution for makers, small businesses, and DIY enthusiasts alike. Unlike traditional heat transfer vinyl that requires weeding and layering, DTF transfers let you print intricate, full-color designs in a single press. In this guide, I'll walk you through everything you need to know about DTF transfers, from how they work to pro tips for flawless application.
What Are DTF Transfers?
DTF stands for Direct to Film. It's a printing method where your design is printed onto a special PET film using water-based inks, then coated with a hot-melt adhesive powder. Once the powder is cured, the transfer is ready to be applied to fabric using a heat press. The result is a soft, stretchable, and incredibly durable print that bonds to the fabric fibers.
What sets DTF apart is its versatility. You can print on a wide range of materials, including cotton, polyester, blends, and even nylon. The process doesn't require pre-treatment, and the colors remain vivid even after many washes. For anyone offering custom apparel, DTF transfers open up a world of design possibilities without the limitations of vinyl cutting.
How DTF Transfers Work: Step by Step
Understanding the workflow helps you appreciate why DTF has gained such a following. Here's a breakdown of the process from start to finish.
1. Design Preparation
Your design should be in a high-resolution format, typically PNG with a transparent background. The printer software mirrors the image so it reads correctly when transferred. Colors are printed in CMYK plus white ink, which acts as a base for opacity on dark garments.
2. Printing
A DTF printer lays down the white ink base first, followed by the color layers. This is crucial for vibrant results on black or dark-colored shirts. The printed film then moves to a powdering station where a fine adhesive powder is applied while the ink is still wet.
3. Curing
The powdered film goes into a curing oven or under a heat source to melt the powder. This creates a smooth, dry surface that will later bond to the fabric. Proper curing is essential; undercured transfers may peel, while overcured ones can become brittle.
4. Heat Press Application
Once you have your cured transfer, you're ready to press. Set your heat press to around 300-325°F (150-160°C) with medium pressure. Pre-press the garment for a few seconds to remove moisture, then place the transfer with the design facing up. Press for 10-15 seconds, then peel the film while it's still warm (warm peel) or let it cool completely (cold peel), depending on the film type.
5. Finishing
After peeling, a quick second press with a cover sheet for 5-10 seconds ensures the design is fully embedded. This step also gives the print a matte finish and improves wash durability.
Why Choose DTF Transfers Over Other Methods?
If you're comparing decoration options, here's how DTF stacks up against common alternatives.
- No weeding or layering: Unlike heat transfer vinyl (HTV), DTF doesn't require cutting and weeding. You can print complex designs with fine details and gradients in one go.
- Works on many fabrics: DTF adheres well to cotton, polyester, blends, and even treated nylon. HTV often struggles with high-polyester garments.
- Vibrant colors: The white ink base ensures colors pop on dark fabrics, something that direct-to-garment (DTG) printing sometimes lacks without pretreatment.
- Cost-effective for small batches: Screen printing requires setup costs per color, making it expensive for short runs. DTF is economical for one-offs and small orders.
- Soft feel: Advances in adhesive powders have made DTF prints softer and more stretchable than early versions, though they may still have a slight hand compared to DTG.
Common Challenges and How to Overcome Them
Even with a straightforward process, issues can arise. Here are solutions to frequent problems.
Peeling After Wash
If your transfer peels, it's usually due to insufficient pressure, incorrect temperature, or undercured powder. Invest in a heat press with consistent pressure and use a infrared thermometer to verify temperature. Also, ensure the powder is fully melted during curing.
Dull Colors or Fading
Dull prints often result from inadequate white ink coverage or too little pressure during pressing. Make sure your printer profile is correct and that you're using quality film and powder. Storing transfers in a cool, dry place also prevents ink degradation.
Stiff or Rubbery Feel
Some DTF transfers can feel thick, especially on large designs. To minimize this, use a fine powder and avoid over-pressing. Choosing a high-quality transfer supplier also makes a difference; cheaper films may require more adhesive.
Tips for Perfect DTF Transfers Every Time
After countless presses, I've picked up a few tricks that consistently deliver professional results.
- Pre-press your garment: This removes wrinkles and moisture, ensuring the transfer adheres evenly.
- Use a cover sheet: A Teflon sheet or parchment paper protects the transfer and prevents sticking.
- Test your settings: Every heat press varies. Run a test with a small design to dial in temperature, pressure, and time.
- Peel at the right temperature: Follow the film manufacturer's recommendation. Warm peel is common, but some films require cold peel.
- Wash inside out: Advise your customers to turn garments inside out and wash in cold water to extend the life of the print.
DTF Transfers vs. Other Decoration Methods
To help you decide, here's a quick comparison.
- DTF vs. HTV: DTF wins for complex, multi-color designs and unusual fabrics. HTV is better for simple one-color logos and stretchy materials like spandex.
- DTF vs. DTG: DTG is excellent for 100% cotton and has a softer feel, but DTF offers better durability on blends and dark colors.
- DTF vs. Screen Printing: Screen printing is more cost-effective for large orders of simple designs, but DTF excels for detailed artwork and small batches.
Applications of DTF Transfers
Beyond t-shirts, DTF transfers are used on hoodies, tote bags, caps, and even denim jackets. The ability to print on demand makes it a favorite for personalized gifts, promotional items, and fashion brands that want to test designs without inventory risk.
Frequently Asked Questions
How long do DTF transfers last?
With proper application and care, DTF transfers can last 50+ washes. The key is correct curing and pressing, plus washing inside out in cold water and avoiding bleach.
Can I use DTF transfers on polyester?
Yes, DTF works well on polyester, including high-poly blends. However, you may need to lower the press temperature to around 280-300°F to prevent dye migration. Using a low-temperature film can also help.
Do I need a special printer for DTF?
You need a DTF printer that uses DTF inks and has a white ink channel. Converted Epson printers are popular, but dedicated DTF printers offer better reliability and print quality.
What is the best way to store DTF transfers?
Store them flat in a cool, dry place away from direct sunlight. Avoid stacking heavy items on top, as this can damage the powder coating. Properly stored transfers remain usable for months.
Can I stretch DTF transfers?
DTF transfers have some stretch, but they are not as elastic as HTV. For highly stretchy fabrics like spandex, consider using a stretchable HTV or a DTF film designed for stretch.
Whether you're a hobbyist or a growing apparel brand, DTF transfers offer a flexible, vibrant, and durable way to bring your designs to life. With the right equipment and a bit of practice, you can achieve professional results that keep customers coming back.