
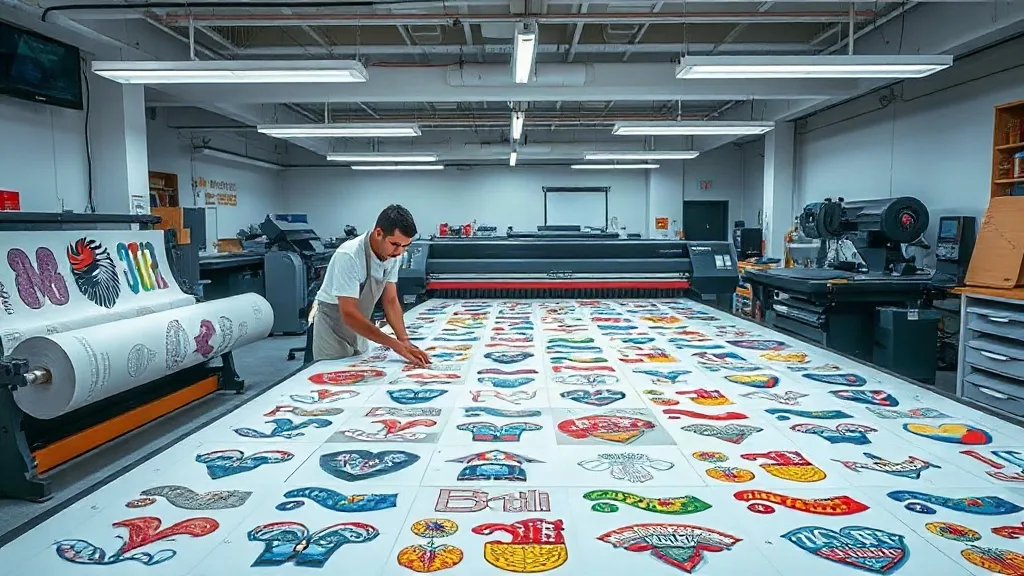
In the competitive world of custom apparel printing, efficiency and cost-effectiveness are key to staying profitable. Whether you run a small print shop or a growing online store, the way you handle your transfers can make or break your margins. Enter the DTF Gangsheet—a game-changing approach that lets you print multiple designs on a single sheet, maximizing your resources and minimizing waste. In this guide, we'll dive deep into what a DTF gangsheet is, how it works, and why it might be the missing piece in your production puzzle.
What Is a DTF Gangsheet?
A DTF gangsheet is essentially a large sheet of transfer film that contains multiple designs printed together. Instead of printing each design individually, you arrange several graphics onto one sheet, which is then printed using a DTF printer. The sheet is subsequently powdered with adhesive, cured, and can be pressed onto garments as needed. This method is particularly popular among apparel decorators because it significantly reduces setup time and material waste.
Think of it as a digital version of gang printing in offset lithography, where multiple jobs are combined to fill a press sheet. In DTF, the gangsheet allows you to nest different sizes and shapes, ensuring that every inch of film is used efficiently. The result? Lower cost per transfer, faster turnaround, and a more streamlined workflow.
Why Use a DTF Gangsheet?
The benefits of gangsheets are numerous, but they all boil down to three main advantages: cost savings, time efficiency, and flexibility.
Cost Savings
DTF film and ink are not cheap. By maximizing the use of each sheet, you reduce the amount of wasted material. For example, if you have a small logo that only takes up a few inches, printing it alone would leave a lot of unused film. With a gangsheet, you can fill the remaining space with other designs, effectively spreading the cost across multiple jobs. This is especially beneficial for small orders that might otherwise be unprofitable.
Time Efficiency
Printing multiple designs in one go means fewer printer setups and less downtime. You can prepare a gangsheet with all the designs needed for the day's orders, print it once, and then cut them apart as needed. This batching process saves hours of manual labor and allows you to focus on other aspects of your business.
Flexibility
Gangsheets are incredibly versatile. You can mix different sizes, colors, and even different types of designs on the same sheet. Whether you're printing t-shirt fronts, sleeve prints, or tote bag graphics, you can arrange them all together. This flexibility is perfect for shops that handle a variety of custom orders.
How to Create a DTF Gangsheet
Creating a gangsheet requires some planning and the right tools. Here's a step-by-step overview of the process.
Step 1: Gather Your Designs
Collect all the artwork you need to print. Ensure each design is properly prepared: vectorized or high-resolution raster, with transparent backgrounds, and correctly sized for the intended garment. Pay attention to color profiles—DTF printing uses CMYK, so convert your files accordingly.
Step 2: Use Gangsheet Software
While you can manually arrange designs in graphic design software like Photoshop or Illustrator, dedicated gangsheet software or RIP (Raster Image Processor) software can automate the nesting process. These tools optimize the layout to minimize waste and can even calculate the required film length. Some popular options include Gangsheet Builder, DTF RIP software, and features within Onyx or Flexi.
Step 3: Arrange Designs Efficiently
Nesting is both an art and a science. Place larger designs first, then fill gaps with smaller ones. Rotate designs if necessary to fit better. Leave a small margin between designs (about 0.25 inches) to allow for cutting. Also, consider the grain of the film—while DTF film doesn't have a grain, keeping designs aligned can make cutting easier.
Step 4: Print and Cure
Once your gangsheet is laid out, send it to your DTF printer. After printing, apply hot melt adhesive powder evenly over the wet ink, shake off excess, and cure the sheet in a heat press or oven according to your powder's specifications. The sheet is now ready to be cut and pressed onto garments.
Best Practices for DTF Gangsheets
To get the most out of your gangsheets, follow these best practices.
- Plan your layout: Use software to preview the layout and ensure no design is cut off. Double-check dimensions and spacing.
- Group by color: If you're printing multiple designs with similar color palettes, group them to reduce ink changes and improve color consistency.
- Keep a library of common designs: If you frequently print certain logos or graphics, save them as templates to quickly add to gangsheets.
- Label and organize: After printing, label each design on the sheet (or keep a map) to avoid confusion during cutting and pressing.
- Test your powder and cure settings: Different powders and environmental conditions can affect adhesion. Always run a test print before committing to a large gangsheet.
Common Mistakes to Avoid
Even experienced printers can run into issues with gangsheets. Here are some pitfalls to watch out for.
Overcrowding the Sheet
While it's tempting to fill every inch, overcrowding can lead to cutting errors and difficulty in peeling. Leave enough space between designs to allow for clean cuts.
Ignoring Color Consistency
If you're printing the same design in multiple sizes on one sheet, ensure that the colors match across all instances. Variations can occur due to ink density or curing inconsistencies. It's better to print identical designs together in one batch.
Using Low-Quality Film
Not all DTF film is created equal. Cheap film can cause ink bleeding, poor adhesion, or premature fading. Invest in reputable film that is compatible with your printer and powder.
Forgetting About Fabric Compatibility
DTF transfers work on a wide range of fabrics, but some fabrics (like nylon or treated polyester) may require special handling. Always test on a swatch before pressing a full gangsheet's worth of designs.
DTF Gangsheet vs. Individual Transfers
You might wonder why not just print each design separately. Here's a quick comparison.
- Cost: Gangsheets reduce film and ink waste, lowering cost per transfer.
- Time: Batching saves printer setup time and allows for continuous production.
- Storage: A single gangsheet takes up less space than multiple individual transfers.
- Flexibility: Gangsheets allow you to mix designs, while individual transfers are one-off.
Of course, if you have a single large design that fills an entire sheet, a gangsheet isn't necessary. But for most shops with varied orders, gangsheets are a no-brainer.
Frequently Asked Questions
Can I reuse a DTF gangsheet after pressing?
No, DTF transfers are single-use. Once the design is pressed onto a garment, the film cannot be reused. However, you can cut the gangsheet into individual transfers and store unused portions for later.
How do I store unused gangsheets?
Store them in a cool, dry place away from direct sunlight. Keep them flat or roll them loosely with the printed side facing out to avoid creasing. Proper storage prevents the adhesive from activating prematurely.
What is the maximum size of a DTF gangsheet?
The maximum size depends on your printer's capabilities. Common widths are 13, 17, and 24 inches, with lengths limited by the roll. Some industrial printers can handle wider rolls. Always check your printer's specifications.
Do I need special software to create a gangsheet?
While you can manually arrange designs in graphic design software, dedicated gangsheet software or RIP software can automate nesting and optimize film usage. It's not strictly necessary but highly recommended for efficiency.
How does DTF gangsheet printing compare to screen printing for bulk orders?
For large bulk orders with few designs, screen printing is often more cost-effective. However, for small to medium orders with multiple designs, DTF gangsheets offer greater flexibility and lower setup costs. It's a matter of matching the method to the job.